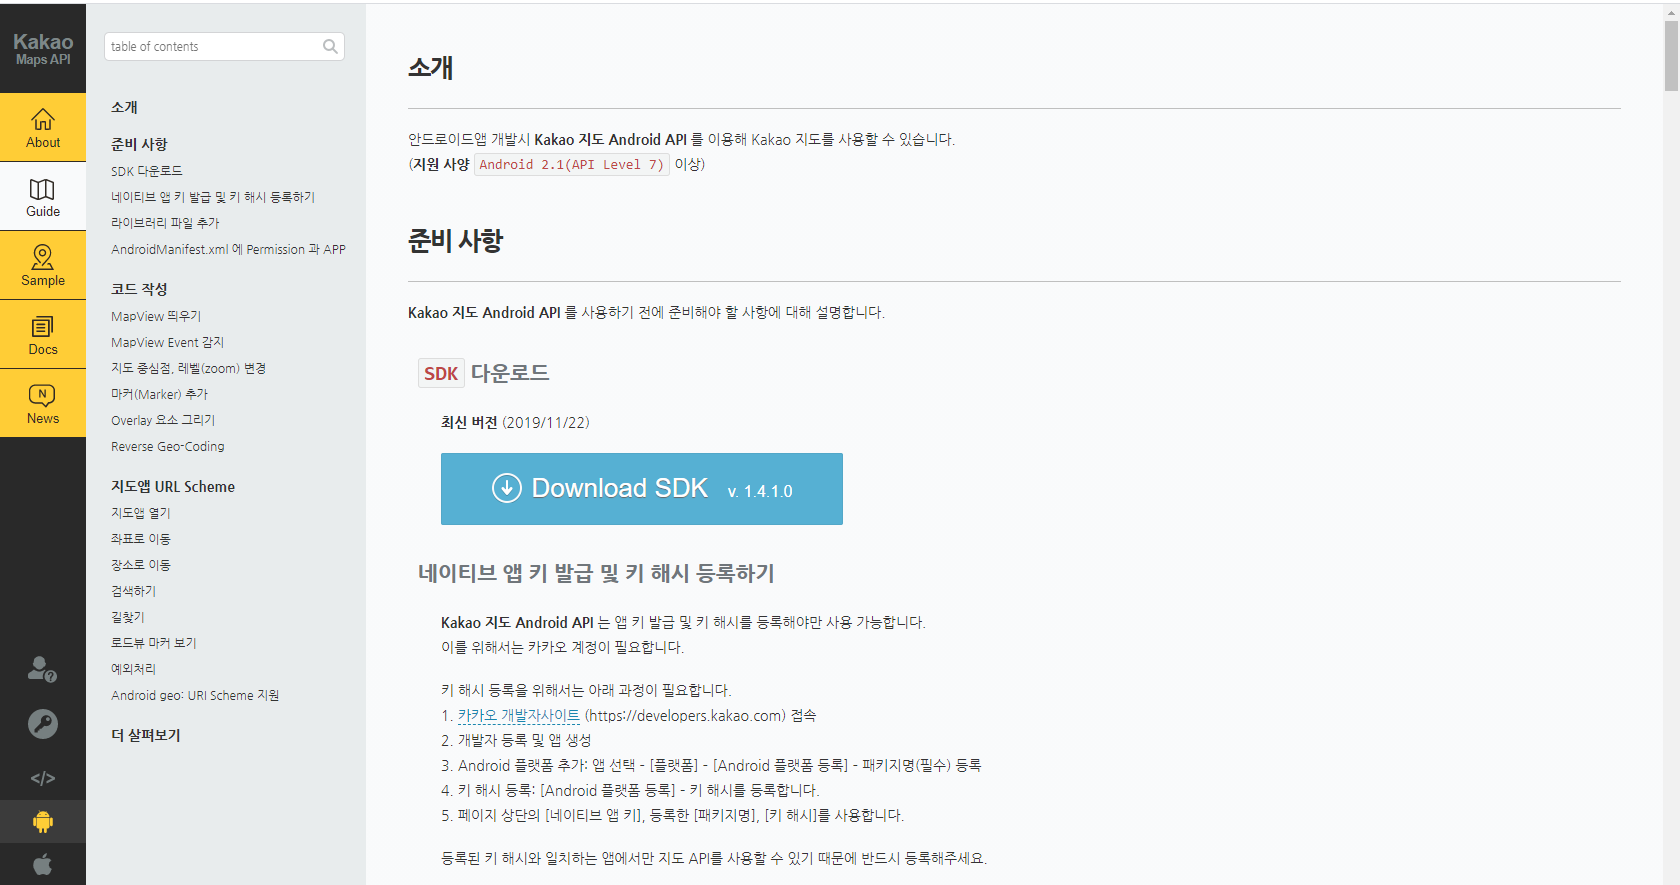
1. SDK파일 다운로드
카카오 공식문서에서 DownLoad SDK 버튼을 눌러 다운받고 압축을 푼다. 위치는 상관 없다.
카카오 공식 문서 : https://apis.map.kakao.com/android/guide/
2. 카카오 개발자 사이트 - 개발자 등록, 앱 생성
개발자 사이트 https://developers.kakao.com/ 에서 개발자등록을 하고 앱을 생성한다.
내 안드로이드 프로젝트 파일의 패키지명이 필요하다.
패키지명은 프로젝트 파일 중 AndroidManifest.xml 상단에서 확인할 수 있다.
<manifest xmlns:android="http://schemas.android.com/apk/res/android"
    package="이 부분이 패키지명">
** 내 프로젝트의 디버그 키 해시 값 구해서 등록하기
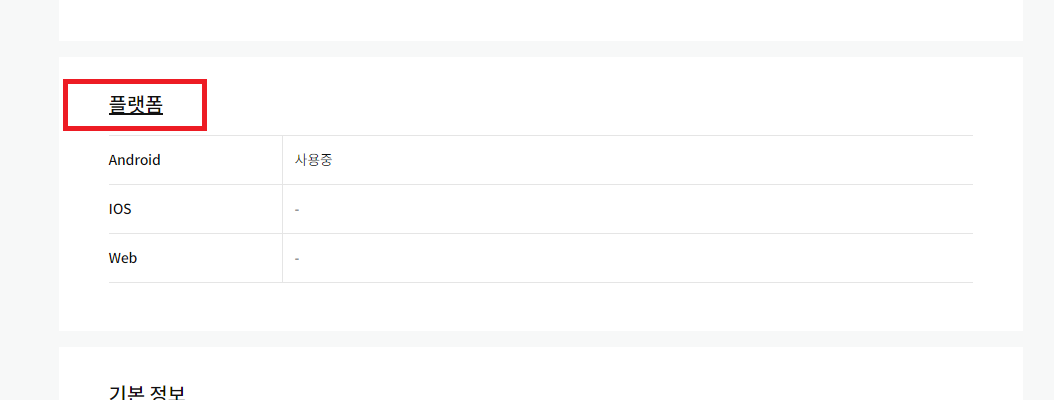
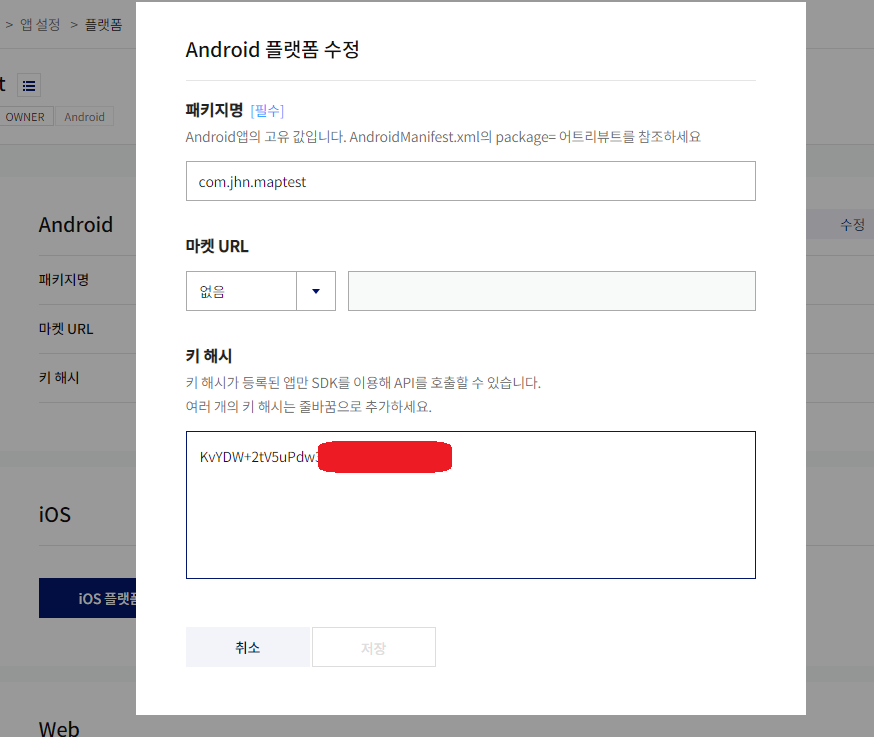
앱을 생성하고 안드로이드 플랫폼을 등록한다.
이 때 내 안드로이드 프로젝트의 키 해시 값이 필요하다.
/ 카카오 해시키 받아오는 코드
//    private void getAppKeyHash() {
//        try {
//            PackageInfo info = getPackageManager().getPackageInfo(getPackageName(), PackageManager.GET_SIGNATURES);
//            for (Signature signature : info.signatures) {
//                MessageDigest md;
//                md = MessageDigest.getInstance("SHA");
//                md.update(signature.toByteArray());
//                String something = new String(Base64.encode(md.digest(), 0));
//                Log.e("Hash key", something);
//            }
//        } catch (Exception e) {
//            // TODO Auto-generated catch block
//            Log.e("name not found", e.toString());
//        }
//    }
@Override
protected void onCreate(Bundle savedInstanceState) {
super.onCreate(savedInstanceState);
setContentView(R.layout.activity_main);
// getAppKeyHash(); => 해시키 불러오는 코드
참고 : https://gyubgyub.tistory.com/m/29?category=858295
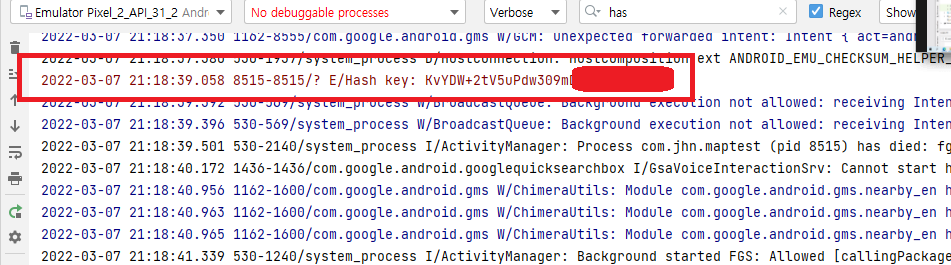
Log.e("Hash key", something) 부분이 해시 키 출력 코드이다.
Log.e 이므로 로그에 빨간색으로 떠서 쉽게 찾을 수 있다.
해시 키는 외부에 노출되지 않도록 하자.
참고로 이건 (개발용)디버그 키의 해시값이므로
배포 시에는 릴리즈 키를 발급해서 릴리즈 키 해시값을 넣어줘야 한다!
※※※※
여러 사람이 함께 개발한다면
개발에 참여하는 모든 사람들의 프로젝트의 키 해시값을 구해서 모두 등록해줘야한다!!
키 해시 값을 등록하지 않은 사람은 테스트 시 카카오맵 부분이 실행되지 않는다.
이걸 모르고 지나쳐서 오류잡는다고 한참 빙빙돌았다.
다른 사람들한테 저 코드 실행해서 나오는 키 해시 값 알려달라고해서
플랫폼 등록 시 키 해시 값 란에 엔터로 구분해 모두 넣어주면 된다.
※※※※
3. 다운 받은 SDK 파일을 프로젝트에 추가
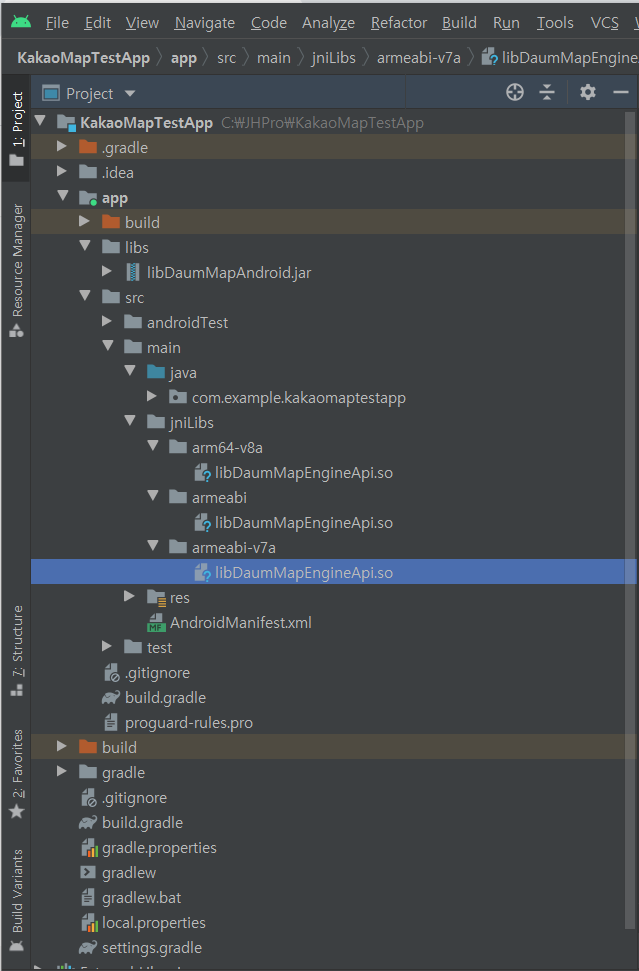
먼저 안드로이드 스튜디오에서 좌측 상단 Android 옆 화살표를 눌러 Project로 바꿔준다.
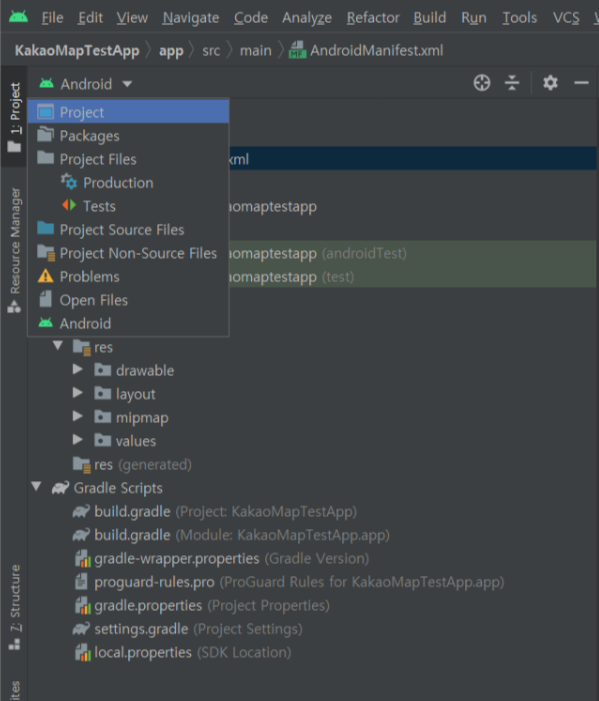
아까 다운 받은 SDK 파일의 압축을 풀고 libs 폴더로 이동하면 이런 모양새다.
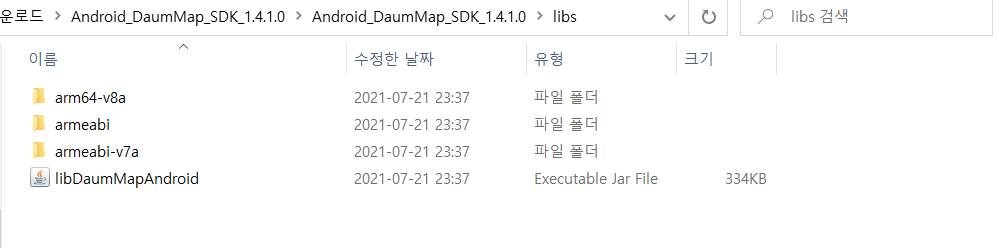
맨 아래 jar파일을 app > libs 폴더에 넣어준다.(위에서 Android를 Project로 바꾸지 않았다면 libs폴더가 보이지 않는다.)
app > src > main 위치에 jniLibs라는 새 폴더를 만들고
폴더 3개를 그대로 넣어준다.
4. app단의 build 파일에 의존성implementation 추가
다시 우측 상단에서 Project로 설정했던 걸 Android로 바꿔서 보기가 편하게 만들자.
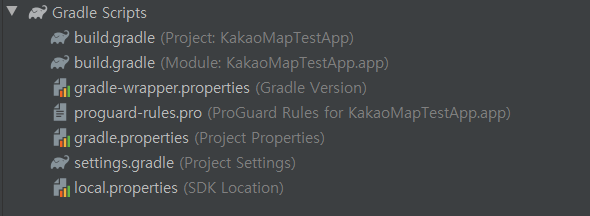
build.gradle(Module: app) 파일의 dependencies 부분에 아래 코드 두 줄을 추가해준다.
(아래 사진의 두 build.gradle 중 아래 것이다)
implementation fileTree(include: ['*.jar'], dir: 'libs')
implementation files('libs/libDaumMapAndroid.jar')
이걸 해 주어야 3번에서 추가한 파일들을 프로젝트가 인식한다.
SyncNow눌러주는 거 잊지 말기
plugins {
id 'com.android.application'
}
android {
compileSdk 32
defaultConfig {
applicationId "com.jhn.maptest"
minSdk 22
targetSdk 32
versionCode 1
versionName "1.0"
testInstrumentationRunner "androidx.test.runner.AndroidJUnitRunner"
}
buildTypes {
release {
minifyEnabled false
proguardFiles getDefaultProguardFile('proguard-android-optimize.txt'), 'proguard-rules.pro'
}
}
compileOptions {
sourceCompatibility JavaVersion.VERSION_1_8
targetCompatibility JavaVersion.VERSION_1_8
}
}
dependencies {
implementation fileTree(include: ['*.jar'], dir: 'libs')
implementation files('libs/libDaumMapAndroid.jar')
implementation 'androidx.appcompat:appcompat:1.4.1'
implementation 'com.google.android.material:material:1.5.0'
implementation 'androidx.constraintlayout:constraintlayout:2.1.3'
testImplementation 'junit:junit:4.13.2'
androidTestImplementation 'androidx.test.ext:junit:1.1.3'
androidTestImplementation 'androidx.test.espresso:espresso-core:3.4.0'
}
5. AndroidMenifest.xml 파일에 Permission과 AppKey 추가
Permission 코드 추가
<uses-permission android:name="android.permission.INTERNET" />
<uses-permission android:name="android.permission.ACCESS_FINE_LOCATION" />
<uses-permission android:name="android.permission.ACCESS_COARSE_LOCATION" />
AppKey 코드 추가
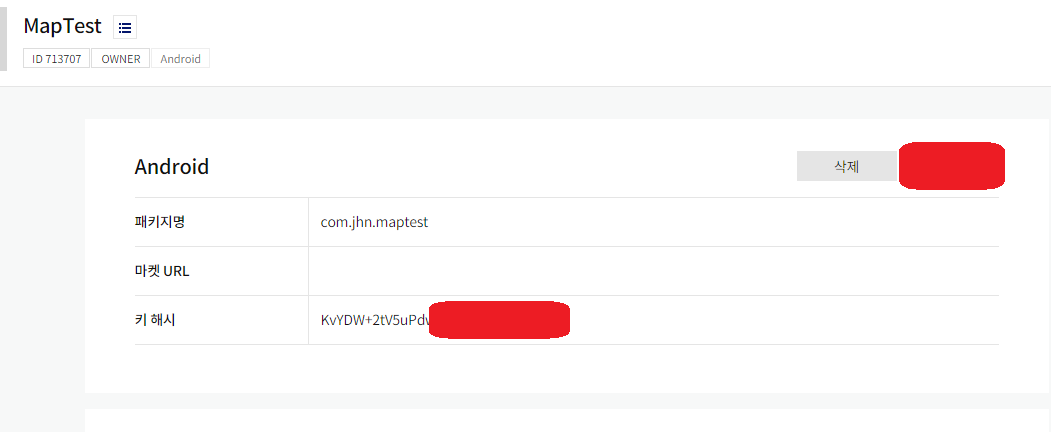
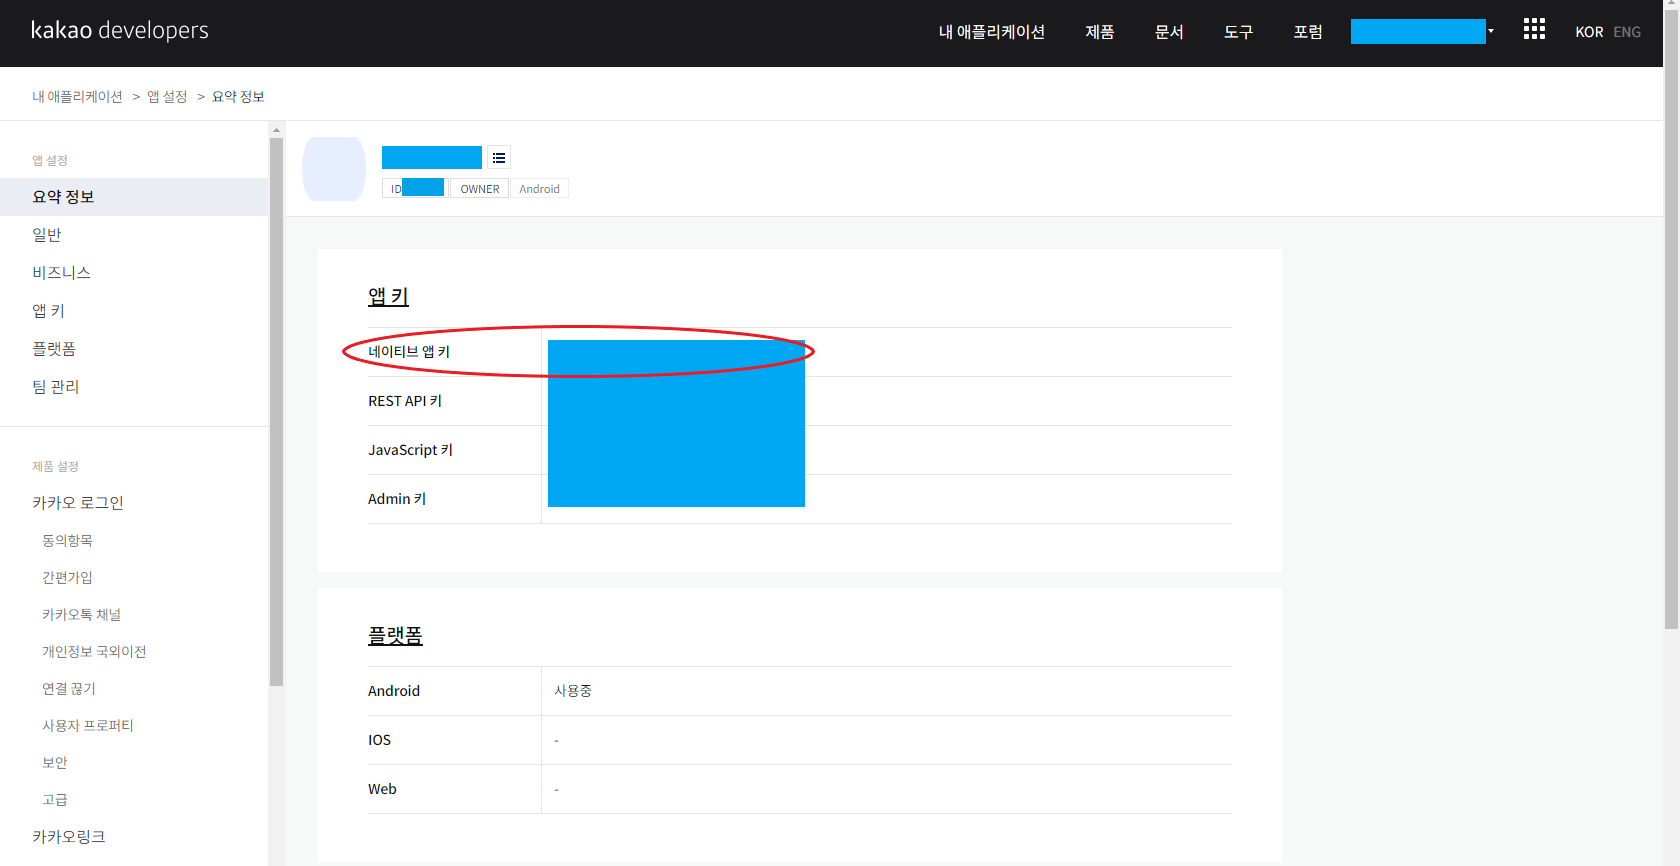
<meta-data android:name="com.kakao.sdk.AppKey" android:value="XXXXXXXXXXXXXXXXXXXXXXXXXXXX"/>android:value 에는 개발자 사이트에서 생성한 앱의 네이티브 앱 키를 넣어준다.
앱 키는 아래 사진처럼 확인할 수 있다.
AndroidMenifest.xml
<?xml version="1.0" encoding="utf-8"?>
<manifest xmlns:android="http://schemas.android.com/apk/res/android"
package="com.jhn.maptest">
<uses-permission android:name="android.permission.INTERNET" />
<uses-permission android:name="android.permission.ACCESS_FINE_LOCATION" />
<uses-permission android:name="android.permission.ACCESS_COARSE_LOCATION" />
<application
android:usesCleartextTraffic="true"
android:allowBackup="true"
android:icon="@mipmap/ic_launcher"
android:label="@string/app_name"
android:roundIcon="@mipmap/ic_launcher_round"
android:supportsRtl="true"
android:theme="@style/Theme.MapTest">
<activity
android:name=".MainActivity"
android:exported="true">
<intent-filter>
<action android:name="android.intent.action.MAIN" />
<category android:name="android.intent.category.LAUNCHER" />
</intent-filter>
</activity>
<meta-data
android:name="com.kakao.sdk.AppKey"
android:value="네이티브 값 넣기"/>
</application>
</manifest>
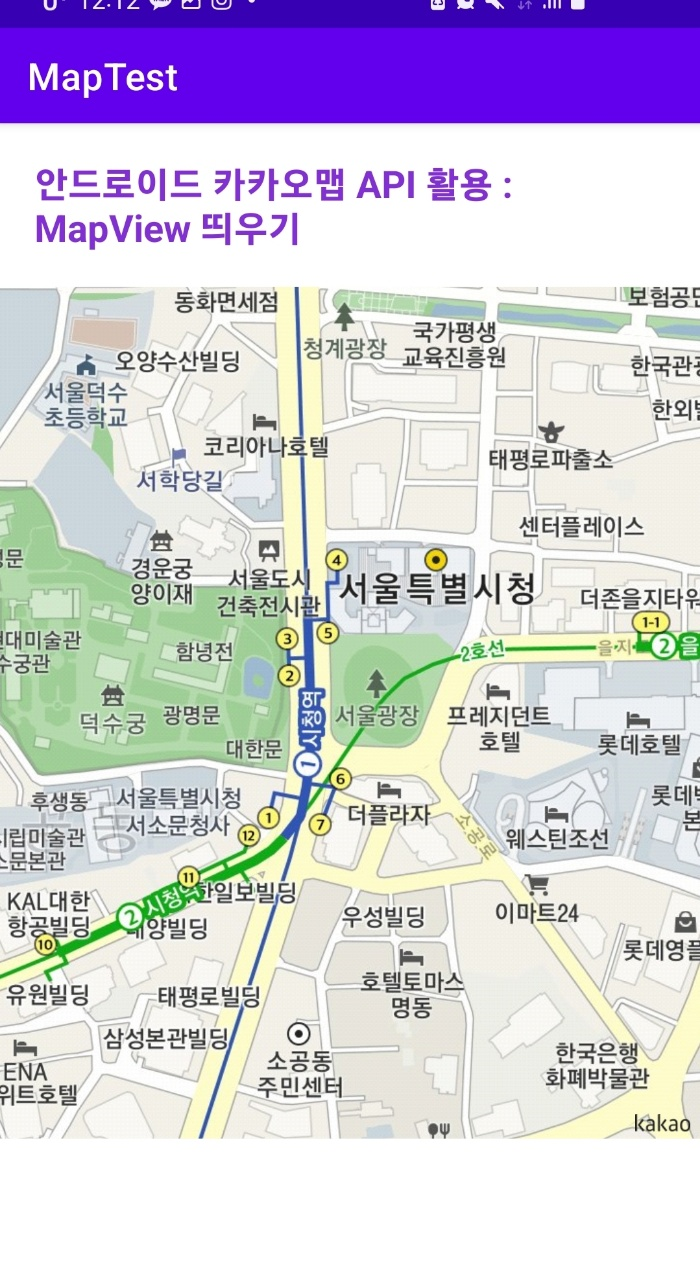
설정이 끝났다!
이제 MapView를 띄우기 위한 코드를 넣고 실행해보자.
xml 에는 id값을 갖는 레이아웃요소를 하나 만들어주자.
activity_main.xml
<?xml version="1.0" encoding="utf-8"?>
<androidx.constraintlayout.widget.ConstraintLayout xmlns:android="http://schemas.android.com/apk/res/android"
xmlns:app="http://schemas.android.com/apk/res-auto"
xmlns:tools="http://schemas.android.com/tools"
android:layout_width="match_parent"
android:layout_height="match_parent"
tools:context=".MainActivity">
<TextView
android:id="@+id/textView"
android:layout_width="wrap_content"
android:layout_height="wrap_content"
android:layout_margin="20dp"
android:text="안드로이드 카카오맵 API 활용 : \nMapView 띄우기"
android:textColor="#822FD5"
android:textSize="20sp"
android:textStyle="bold"
app:layout_constraintStart_toStartOf="parent"
app:layout_constraintTop_toTopOf="parent" />
<androidx.constraintlayout.widget.ConstraintLayout
android:id="@+id/map_view"
android:layout_width="match_parent"
android:layout_height="500dp"
android:layout_marginTop="20dp"
app:layout_constraintTop_toBottomOf="@+id/textView" />
</androidx.constraintlayout.widget.ConstraintLayout>뷰 바인딩을 사용했다. 앱 해시 키 얻는 부분은 이제 필요 없으니 주석처리했다.
MainActivity.kt
package com.jhn.maptest;
import androidx.appcompat.app.AppCompatActivity;
import android.content.pm.PackageInfo;
import android.content.pm.PackageManager;
import android.content.pm.Signature;
import android.os.Bundle;
import android.util.Base64;
import android.util.Log;
import android.view.ViewGroup;
import net.daum.mf.map.api.MapView;
import java.security.MessageDigest;
public class MainActivity extends AppCompatActivity {
// 카카오 해시키 받아오는 코드
// private void getAppKeyHash() {
// try {
// PackageInfo info = getPackageManager().getPackageInfo(getPackageName(), PackageManager.GET_SIGNATURES);
// for (Signature signature : info.signatures) {
// MessageDigest md;
// md = MessageDigest.getInstance("SHA");
// md.update(signature.toByteArray());
// String something = new String(Base64.encode(md.digest(), 0));
// Log.e("Hash key", something);
// }
// } catch (Exception e) {
// // TODO Auto-generated catch block
// Log.e("name not found", e.toString());
// }
// }
  @Override
    protected void onCreate(Bundle savedInstanceState) {
        super.onCreate(savedInstanceState);
        setContentView(R.layout.activity_main);

// getAppKeyHash();   => 해시키 불러오는 코드
MapView mapView = new MapView(this);
ViewGroup mapViewContainer = (ViewGroup) findViewById(R.id.map_view);
mapViewContainer.addView(mapView);
}
}
MapView를 보이는 부분은 이 두 줄만 집중하면 된다.
val mapView = MapView(this)
binding.clKakaoMapView.addView(mapView)
뷰 바인딩을 사용하지 않고 바로 id로 접근하거나 findViewById를 쓴다면
binding.부분을 제외하고 뷰 요소 접근해서 .addView(mapView)해주면 된다.
실행결과